This guide will help you to set up Amazon S3 for storing site backups.
Start by signing in to the AWS Management Console.
Create Bucket
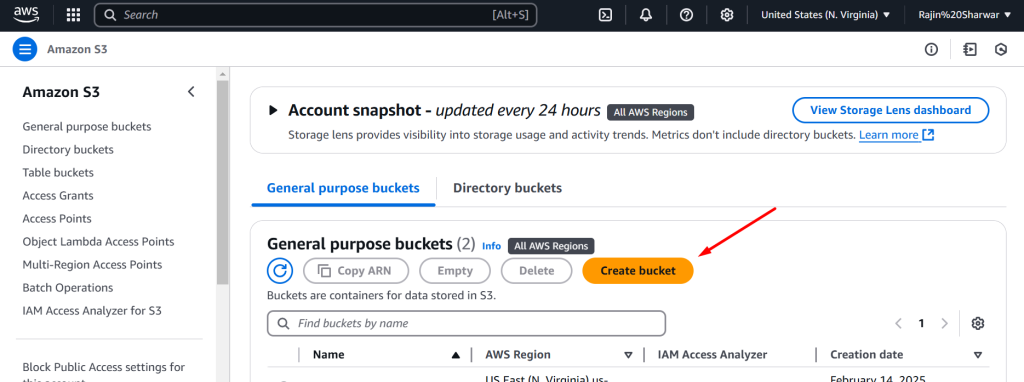
Navigate to S3 and click Create bucket.
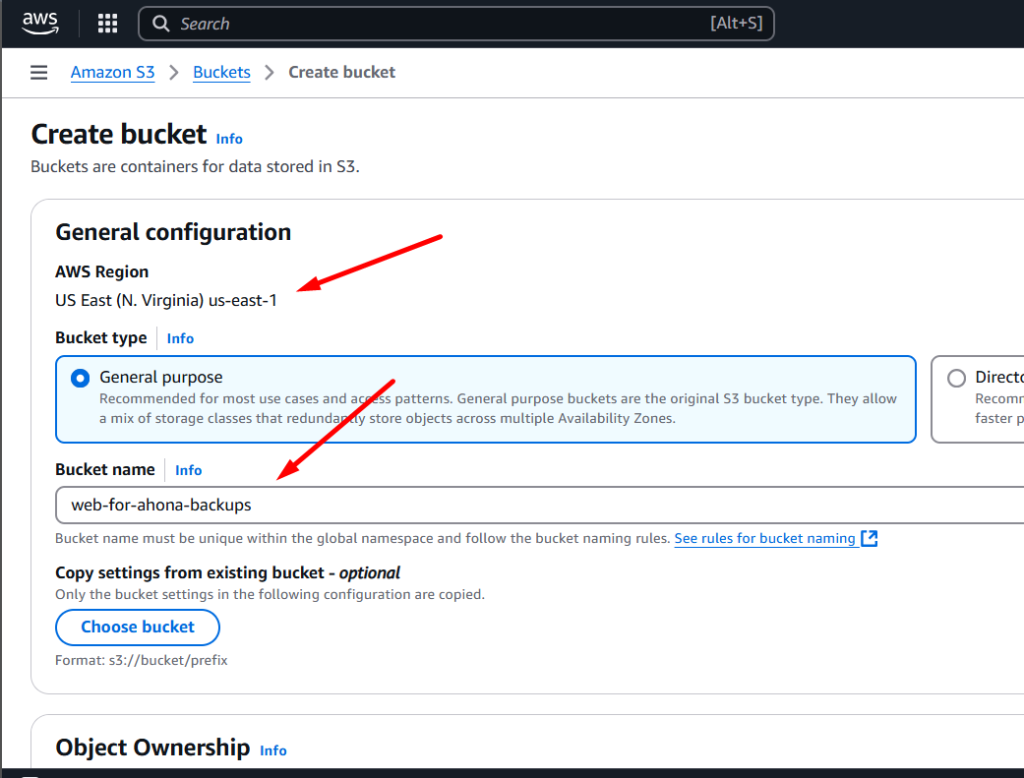
Enter a unique bucket name. A good naming scheme is “domain-name-backups,” for example, “web-for-ahona-backups”.
The region should be geographically close to your server location. This will improve the time it takes to copy backup files from your server to Amazon S3.
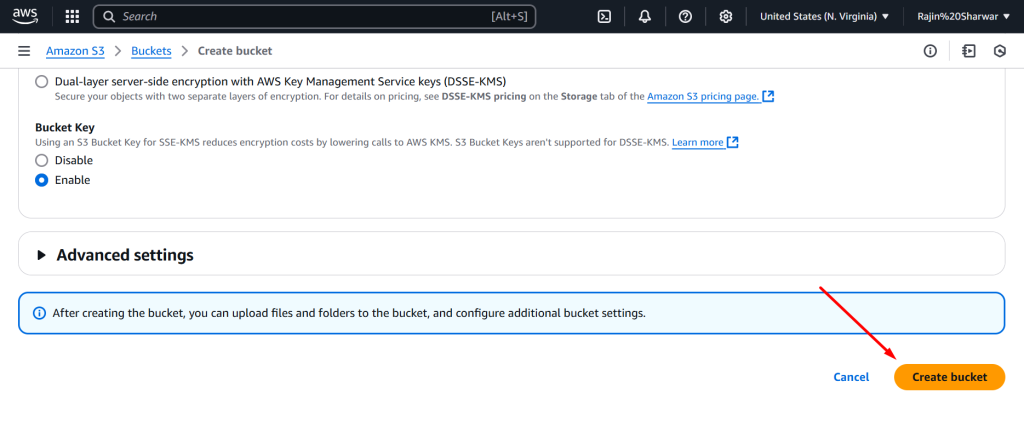
All other options can be left as the default values. Scroll down and click Create bucket.
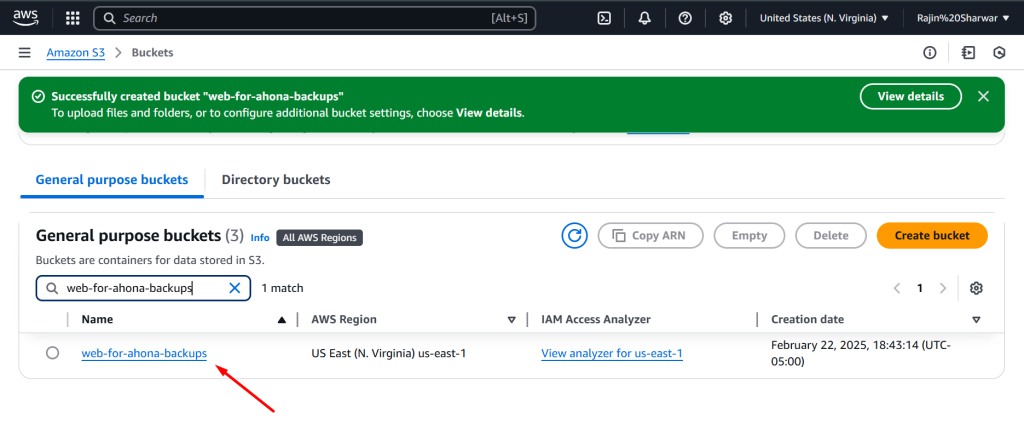
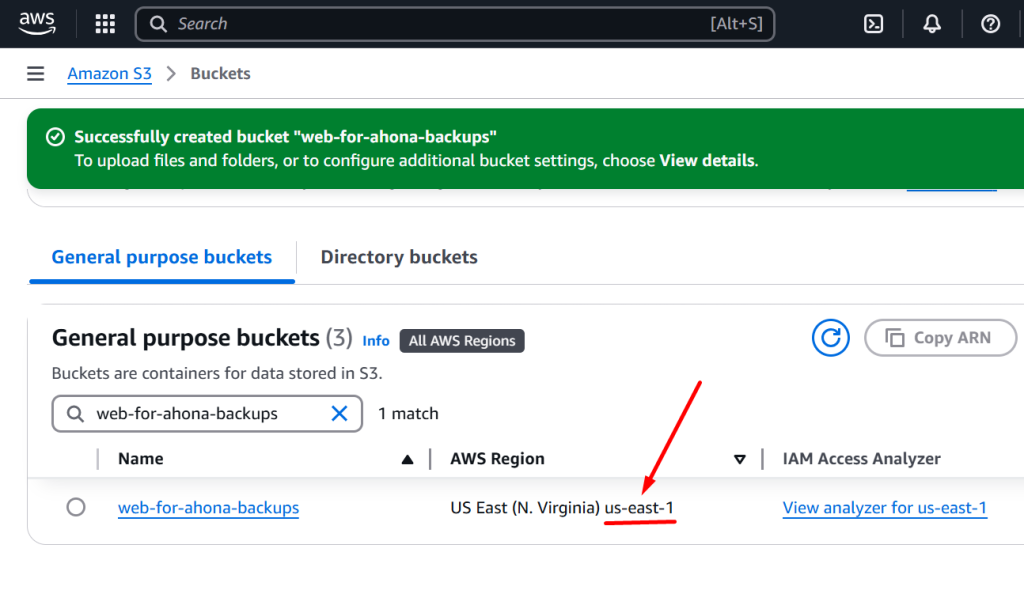
Once the bucket is created, you’ll see it listed with the rest of your buckets. You can also filter buckets by name, if you ever need to find it quickly.
Create IAM User
For LaunchWP to authenticate with Amazon S3, you must create an IAM user. Head over to IAM and click Add user. Click Next.
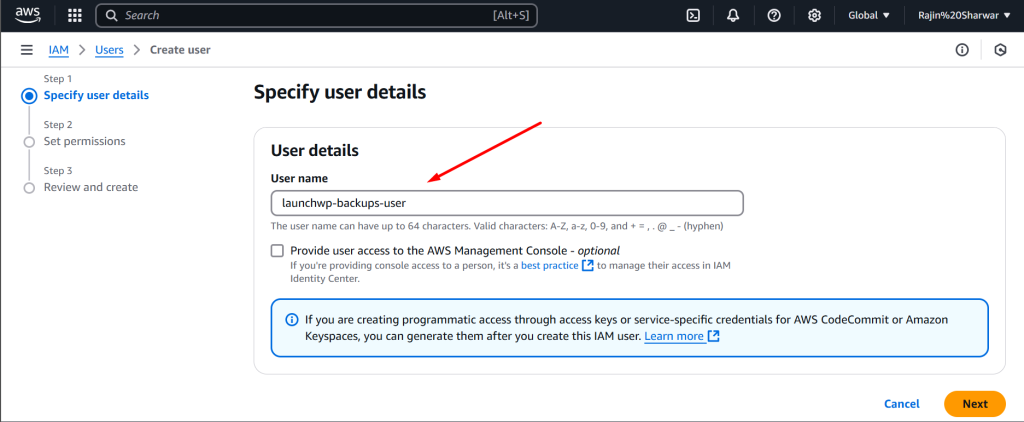
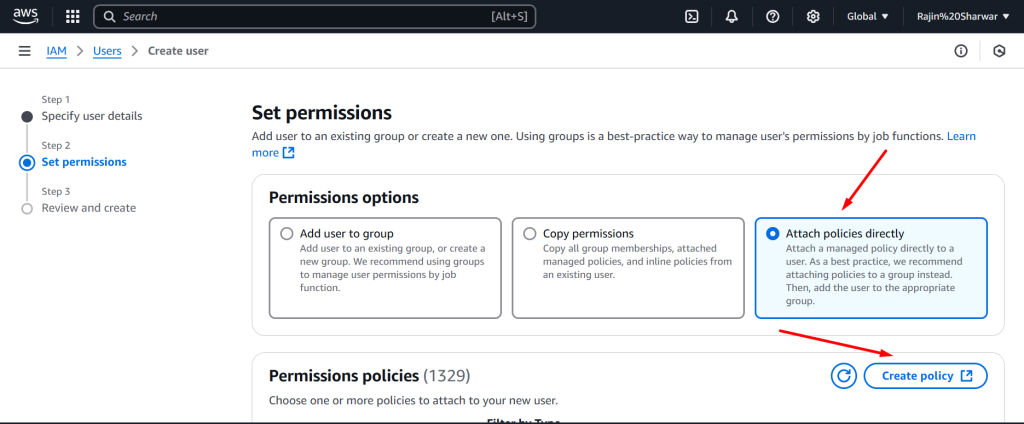
In Set permissions, click Attach policies directly > Create Policy.
In the Specify permissions, choose JSON tab to open the policy JSON editor. Delete what’s there, and paste the following JSON notation:
{
    "Version": "2012-10-17",
    "Statement": [
        {
            "Action": [
                "s3:GetObject*",
                "s3:GetBucket*",
                "s3:List*",
                "s3:DeleteObject*",
                "s3:PutObject",
                "s3:Abort*",
                "s3:CreateBucket"
            ],
            "Resource": "*",
            "Effect": "Allow"
        }
    ]
}
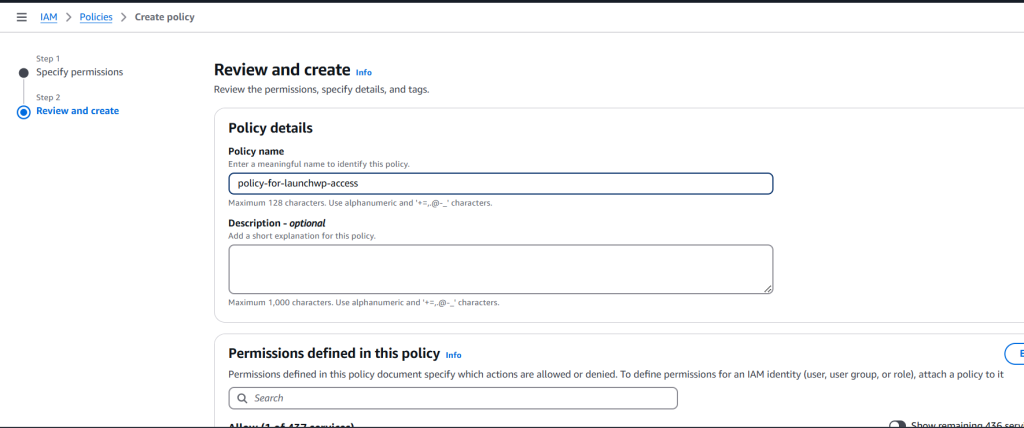
If your JSON is correct, you will see no errors reported in the status bar at the bottom of the screen, and you can click Next. In the next screen, Give your Policy a meanningful name, this makes it easier to attach to the user later. Scroll down to click Create Policy.
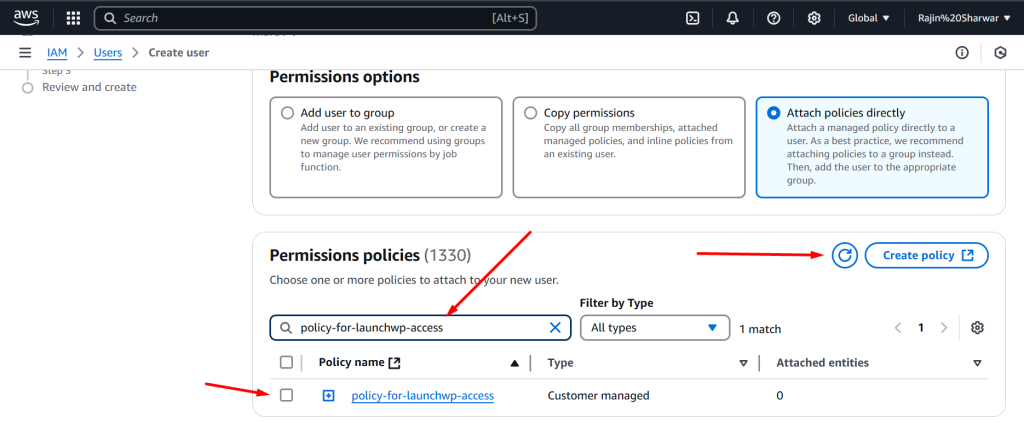
Comeback to your Set permissions page, and click Refresh to update the Policies List. Your newly created policy should appear on that list, which you can filter by searching for the policy name. Tick the checkbox next to the policy name, and click Next.
On the Review and create page, scroll down, and click Create user. Lastly, click View User to copy and paste the credentials.

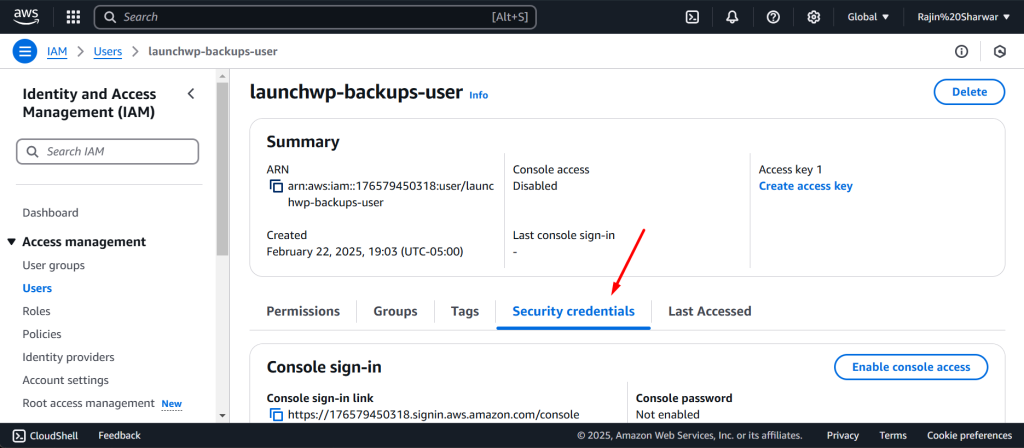
Click Security Credentials > Access Keys > Create access key.
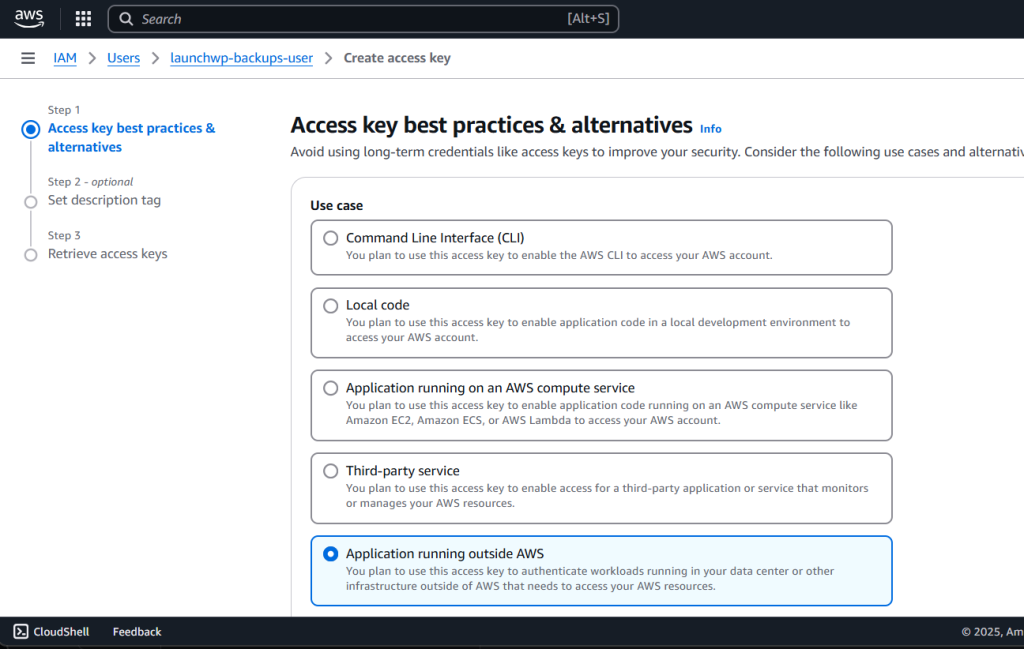
Then choose Application running outside AWS.
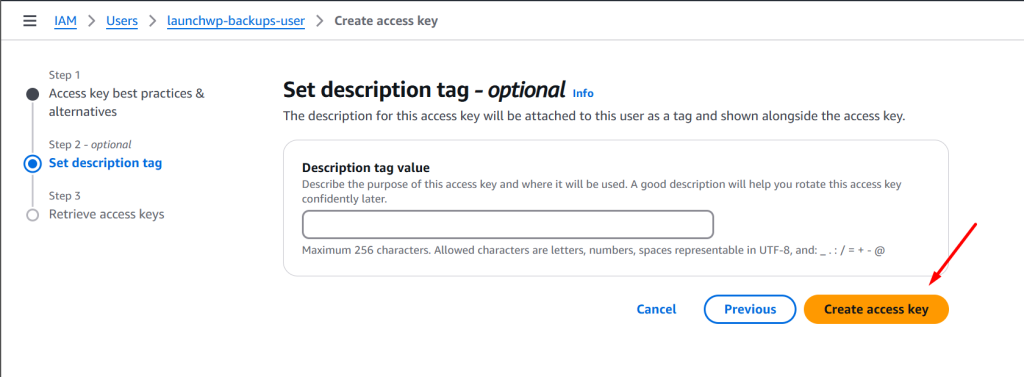
It’s optional to set a tag. You can leave it empty, and click Create access key.
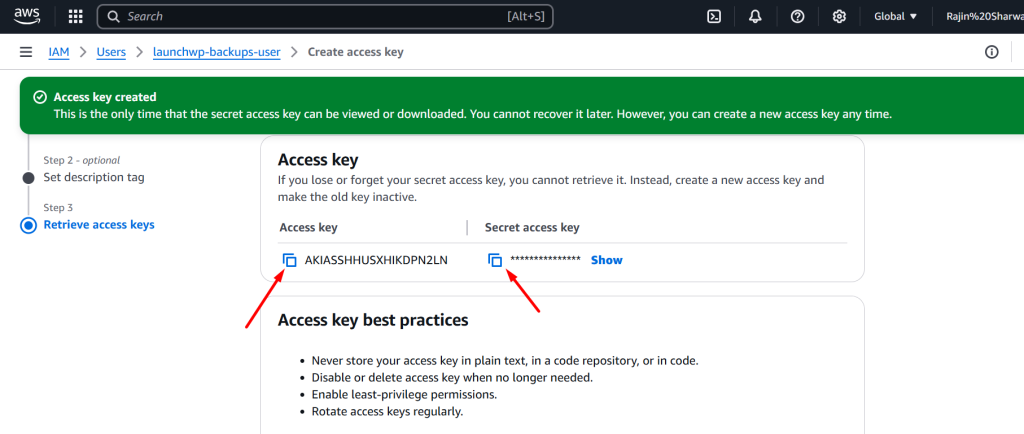
You can now select the Access Key, and Secret Access key.
Comeback to LaunchWP, and go to your Site > Backups > Providers. Click on Add New Provider. Here is a map of what you need to enter to connect.
- Provider Type – Amazon S3
- Provider Name – It should be just a identifer for yourself. You can enter any name as you want.
- Access Key ID – Paste the Access key from the AWS shown on the last screenshot.
- Secret Access Key – Paste the Secret Access key from the AWS shown on the last screenshot.
- Bucket Name – Remember the name of the Bucket you created? For this doc, it was web-for-ahona-backups
- Region – The Region is listed beside your bucket name. See the below screenshot.
Below is how my configuration looks right now.

Finally click Add Provider.
And that’s how you can connect Amazon S3 with LaunchWP. Now you can create on-demand backups or schedule Automatic backups. If you face any issues, feel free to get in touch with us, and we would be more than happy to assist.

