This guide aims to help you set up Backblaze for storing site backups. Start by signing in to Backblaze. Once logged in, it will take you to your list of B2 Cloud Storage Buckets.
Create Bucket
Click Create a Bucket.
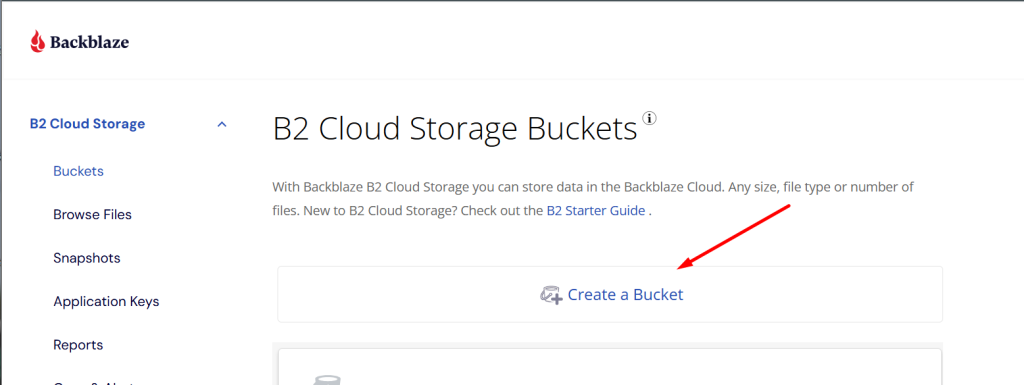
Give the bucket a unique bucket name. A good naming scheme is “domain-name-backups”, for example, “web-for-ahona-backups”. All other options can be left as the default values, and click Create a Bucket to create it.

Create an Application Key
Next, you will need to create an App Key and assign it to the bucket you just created. This ensures that the app key only has access to the content in the bucket. Click on Application Keys in the Backblaze menu. Scroll down on Application Keys page, and click Add a New Application Key.

Give a key a unique name and then select the bucket you created in the previous step from the list of available buckets. The options can be left as the default values. Click Create a New Key to create the key.

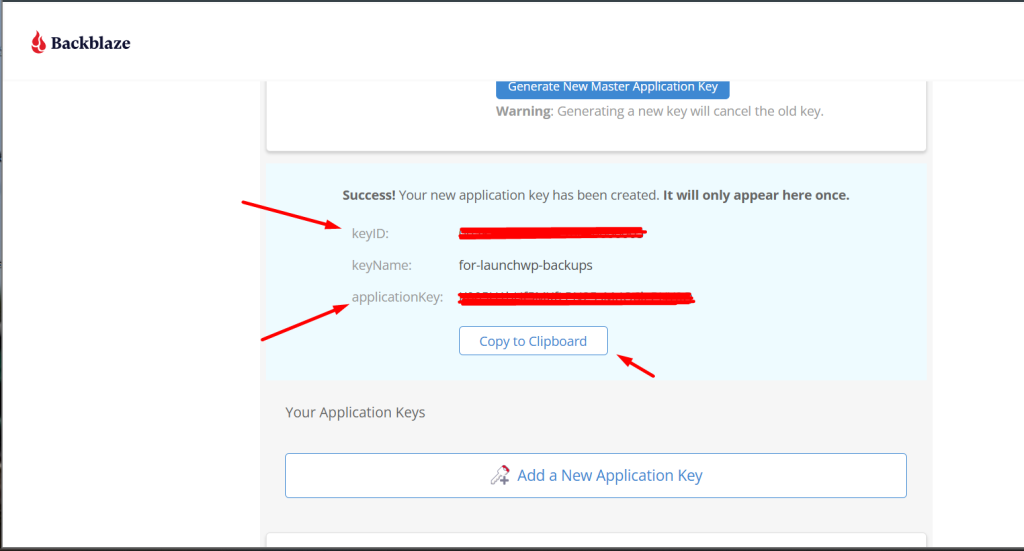
Once the key is created, it will appear just below the “Master Application Key”. Copy the keyID and applicationKey values. Use the keyID and applicationKey in the “Access Key ID” and “Secret Access Key” fields, when adding Backblaze as a storage provider in LaunchWP.
Connect to LaunchWP
Comeback to LaunchWP, and go to your Site > Backups > Providers. Click on Add New Provider. Here is a map of what you need to enter to connect.
- Provider Type – Backblaze
- Provider Name – It should be just a identifer for yourself. You can enter any name as you want.
- Access Key ID – Paste the
keyIDfrom Backblaze shown on the last screenshot. - Secret Access Key – Paste the
applicationKeyfrom the Backblaze shown on the last screenshot. - Bucket Name – Remember the name of the Bucket you created? For this doc, it was web-for-ahona-backups
- Region – The Region you selected when creating the Backblaze account. Backblaze doesn’t allow to create buckets on different regions unlike AWS S3 or other providers. They assign only one region per account. To get your current region, you can view the bucket name, and you can get the Region slug from there.
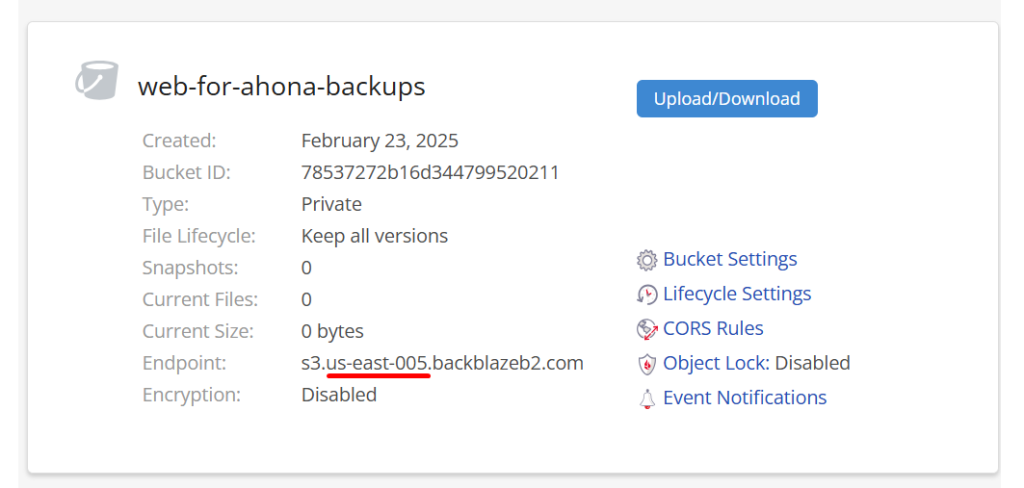
As you can see in the screenshot, in our case, the region is us-east-005. Enter your region when connecting to LaunchWP. After entering all details, your setup in LaunchWP should look something like below:

Finally click Add Provider.
And that’s how you can connect Backblaze B2 with LaunchWP. Now you can create on-demand backups or schedule Automatic backups. If you face any issues, feel free to get in touch with us, and we would be more than happy to assist.
