This guide aims to help you set up Cloudflare R2 for storing site backups. Start by signing in to Cloudflare Dashboard. Once logged in, select R2 Object Storage from the left-side navigation menu, and click Create bucket.
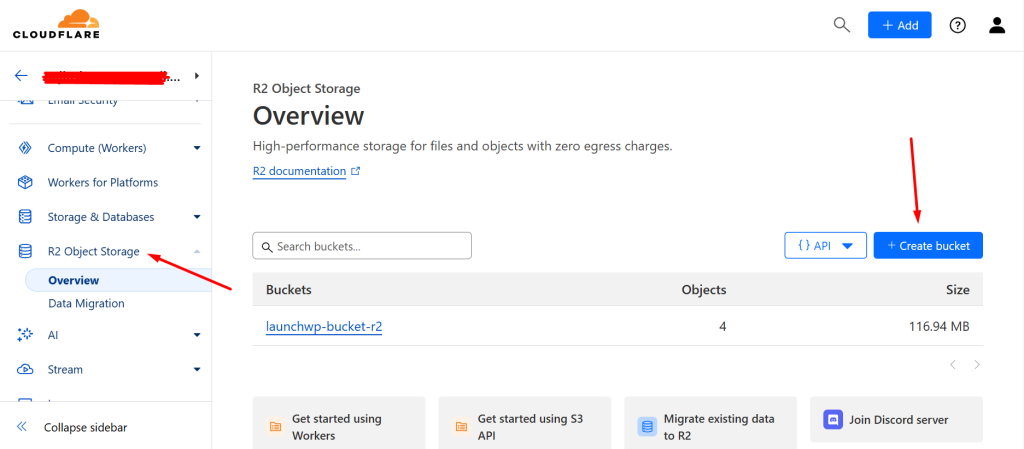
Give the bucket a unique bucket name. A good naming scheme is “domain-name-backups”, for example, “web-for-ahona-backups”. All other options can be left as the default values, and click Create bucket to create it.
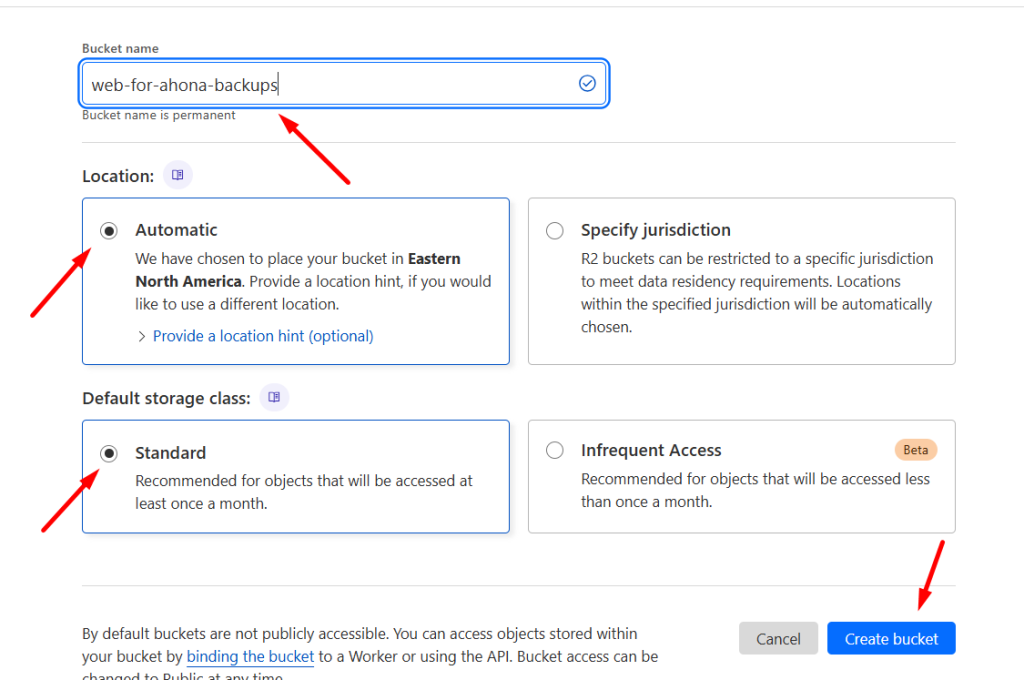
After the Bucket has been created, you would need your Account ID to connect it with LaunchWP. Navigate under Settings, and in the Bucket Details, you will find the S3 API. From the API, you can get your Account ID. The Account ID is the ID starting after the https:// of the S3 API URL, and ending just before the .r2.cloudflarestorage.com/…….. For example, in my case, the S3 API URL is: https://9071094bXXXXXXXXXXXXXXXXXXXXXXXX.r2.cloudflarestorage.com/web-for-ahona-backups. So my Account URL would be 9071094bXXXXXXXXXXXXXXXXXXXXXXXX. (X is used to hide the real account id)
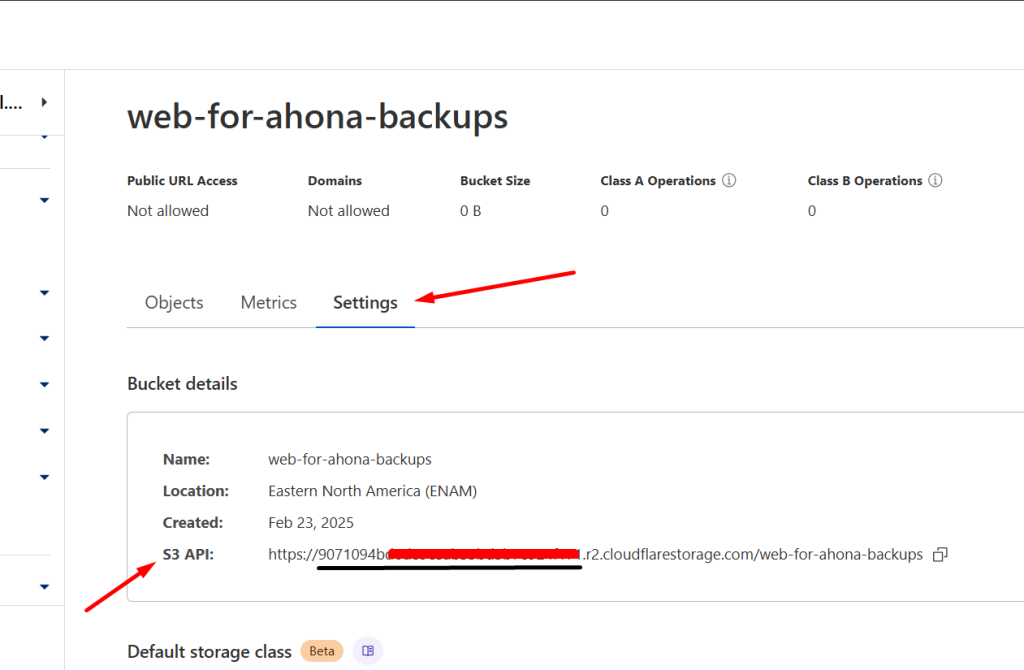
Create API Tokens
Comeback to R2 Object Storage overview screen, and click on Manage API Tokens > Create API Token.
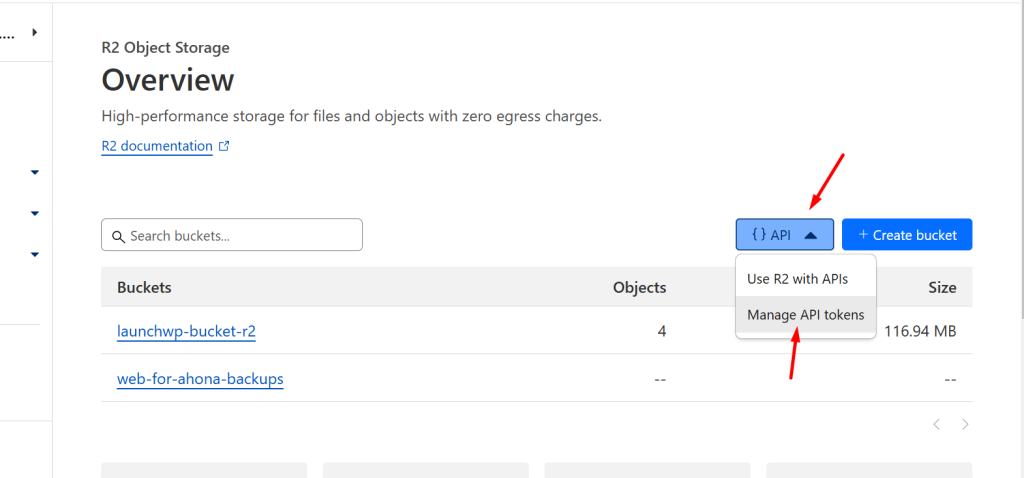
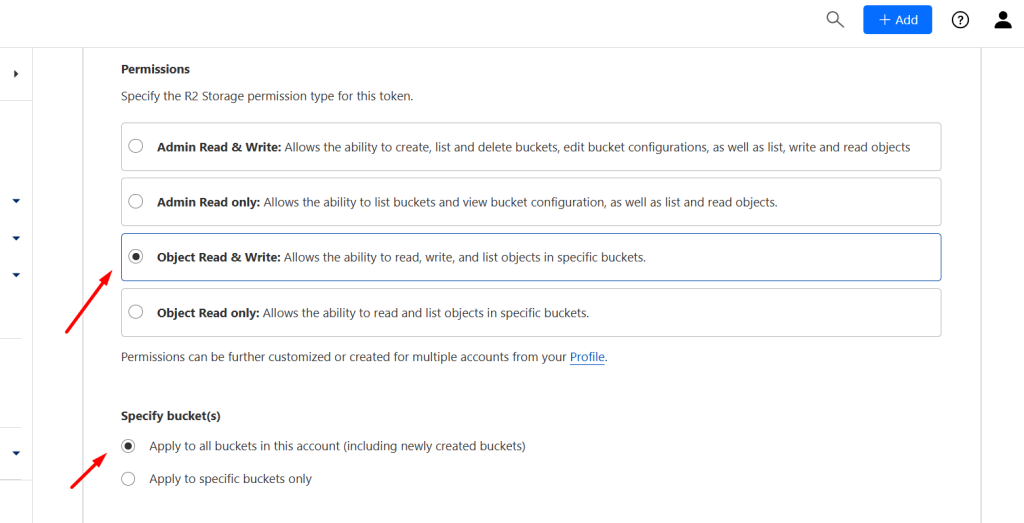
Enter a label for the Token, and in Permissions, select Object Read & Write. In Specify bucket(s), you can either select All Buckets or just select the Bucket you just created. Leave the TTL to Forever. And then click Create API Token.
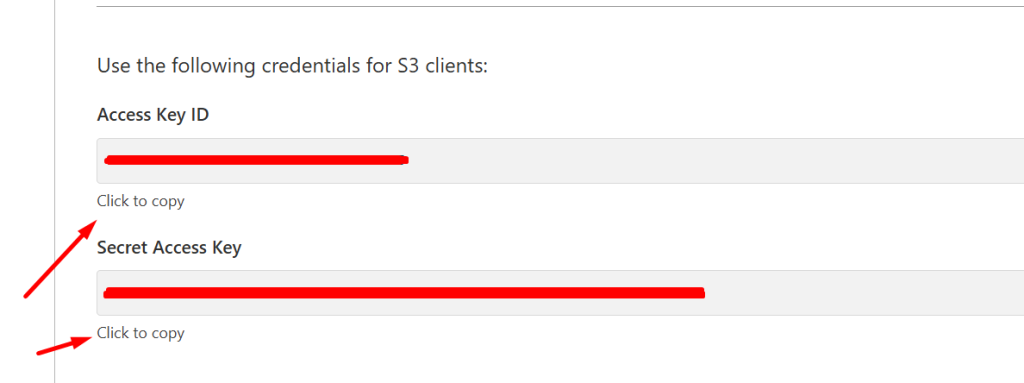
After hitting Create, scroll down to the section of Use the following credentials for S3 clients, and copy the Access Key ID and the Secret Access Key.
Connect to LaunchWP
Comeback to LaunchWP, and go to your Site > Backups > Providers. Click on Add New Provider. Here is a map of what you need to enter to connect.
- Provider Type – Cloudflare R2
- Provider Name – It should be just a identifer for yourself. You can enter any name as you want.
- Access Key ID – Paste the
Access Key IDfrom Cloudflare Dashboard shown on the last screenshot. - Secret Access Key – Paste the
Secret Access Keyfrom the Cloudflare Dashboard on the last screenshot. - Bucket Name – Remember the name of the Bucket you created? For this doc, it was web-for-ahona-backups
- Region – The Region is not necessary when connecting Cloudflare R2. Simply select Custom Region, and enter none.
After entering all details, your setup in LaunchWP should look something like below:

Finally click Add Provider.
And that’s how you can connect Cloudflare R2 with LaunchWP. Now you can create on-demand backups or schedule Automatic backups. If you face any issues, feel free to get in touch with us, and we would be more than happy to assist.
