This guide aims to help you set up Google Cloud Storage for storing site backups. Whether you already have a Google Cloud Platform (GCP) account or not, you can sign in or sign up from the Console home page.
Create Bucket
Head over to Google Cloud Platform > Storage and click Create Bucket.
Enter a unique bucket name. A good naming scheme is “domain-name-backups” for example, “web-for-ahona-backups”.

Select the Region of your storage. For GCP, a region selection doesn’t really matter when connecting to LaunchWP. You can choose anyone from the Multi-region, Dual-region, or simply a single Region. We will go with a single Region us-east1 for this example.

Select the storage class. Select the Set a default class option, and select Nearline for storing backup files. This setting will keep your storage costs low as the backups are infrequently accessed.

Choose how to control access to objects. Check the option of Enforce public access prevention on this bucket. For the Access control, select Uniform.

Choose how to protect object data. You can either go with Soft delete or just uncheck it to make sure your storage is free as soon as you delete backups. The advanced settings can be left as the default values. After you’re done, simply hit Create Bucket.

Create Service Account
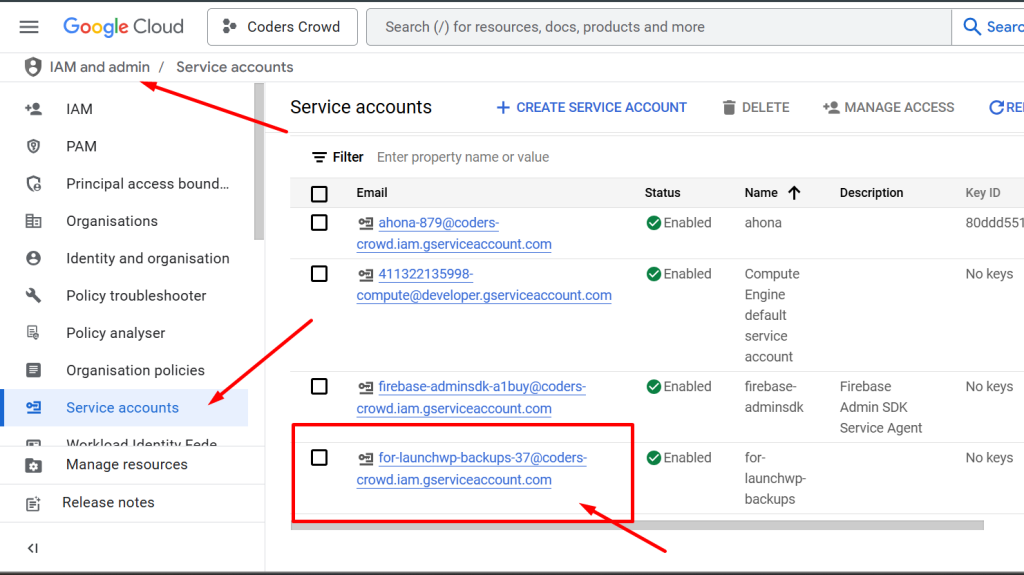
For LaunchWP to authenticate with Google Cloud Storage you must create a service account. Head over to Google Cloud Platform > IAM & admin > Service accounts and click Create Service Account.

Enter a name for the account. For this example, we will go with for-launchwp-backups. The ID will be auto-generated for you. Click Continue.
Next, Grant this service account access to the project. You must select the Storage Admin role. Click Continue. You can skip the step of Grant users access to this service account, as we will be connecting via the Key File.
Next in the list of your all Service Accounts, click on the one you just created.

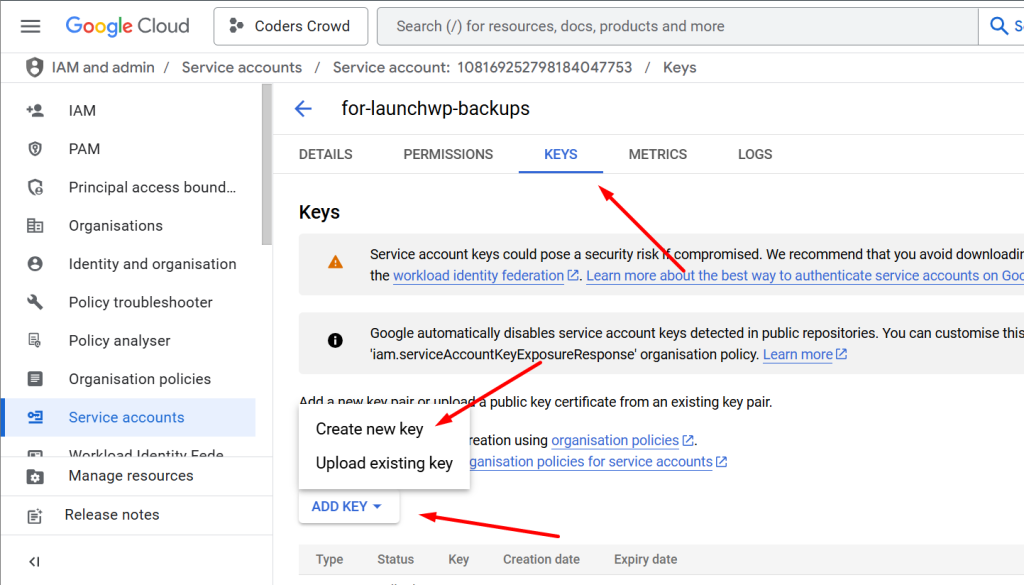
Next, click on the Keys Tab > Add Key > Create new key > Choose Key Type as JSON > Create.

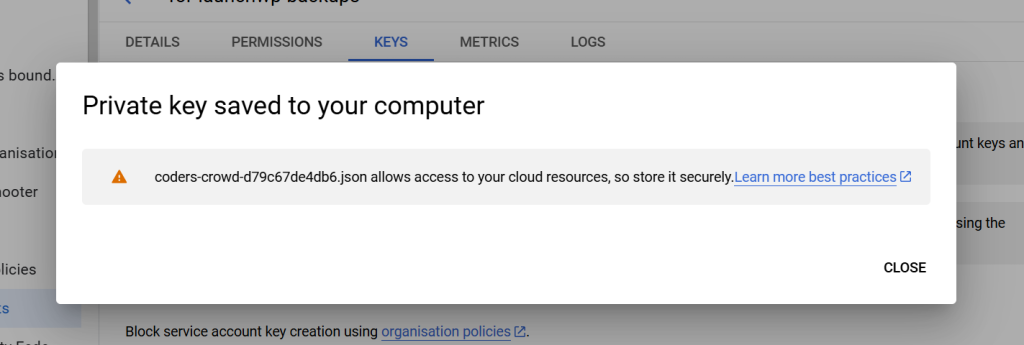
After hitting create, the Private Key should be saved on your computer.

Connect with LaunchWP
Comeback to LaunchWP, and go to your Site > Backups > Providers. Click on Add New Provider. Here is a map of what you need to enter to connect.
- Provider Type – Google Cloud Platform
- Provider Name – It should be just a identifer for yourself. You can enter any name as you want.
- Service Account Key – Click on Upload Service Account File, and select the JSON file just downloaded from Google Cloud Platform.
- Secret Access Key – Paste the Secret Access key from the Linode shown on the last screenshot.
- Bucket Name – Remember the name of the Bucket you created? For this doc, it was web-for-ahona-backups
- Region – The Region you selected when creating the Bucket. For connecting GCP with LaunchWP, the region doesn’t really matter, so even if you do not know the Region slug of the bucket you created, no issues. Simply select the Custom Region, and enter none.
Below is how my configuration looks.

Finally click Add Provider.
And that’s how you can connect Google Cloud with LaunchWP for backups. Now you can create on-demand backups or schedule Automatic backups. If you face any issues, feel free to get in touch with us, and we would be more than happy to assist.

