When you create WordPress website, you get a lot of options to host it. You can go with a shared hosting, a managed hosting, managed services, cloud provider or VPS hosting. Among them, the best option is to install WordPress on VPS or a cloud provider. Before getting started with this article, let’s see a line about each.
- Shared Hosting – Great Pricing, really cheap, but really bad performance and security as 100s of sites are on one server.
- Managed Hosting – Really Expensive, lock-in model, and Zero control of your WordPress hosting.
- Cloud Provider/VPS Hosting – Moderate Cost as you directly buy from compute providers, and extra-ordinary speed and performance as it’s your own private server. But hard to setup, manage and host WordPress manually.
The problem is that installing WordPress on VPS or Cloud Provider, installing software and packages required to run WordPress, setting up SFTP, or PHPMyAdmin, making sure your server ports are secure, and then installing WordPress core, is not an easy task in total, it’s a huge hassle, and time-consuming even for senior developers.
You can try using an Ansible script to automate creating sites, but you have to then manage that Ansible script yourself, and you need to update that script each time you want to update. You can go with preconfigured machine images that some cloud providers offer, but then do not expect your installation to be secure at all, and be ready to regularly restore from your backups because your site got hacked last night.
Not to mention the hassle you will face when you want to upgrade your PHP version or want to add additional sites to the server. You can go with one of the control panel software like cPanel, but be ready to set up everything by yourself, use an 1880s UI, and regularly increase your credit card limit because the license price has gone up again. Even big hosting providers tremble when they see their cPanel license bill!
In this article, we’re going to show you how you can install, manage host WordPress on a VPS without any technical hurdles, in less than 8 minutes using LaunchWP! LaunchWP is the WordPress-focused modern server management dashboard for you. With LaunchWP, you get the speed your WordPress deserves, the security that you need, and features that you will love, that too without breaking the bank, and in your own server.
Let’s get to it!
- Boot/Create your VPS or cloud instance.
- Get it’s SSH details.
- Connect to LaunchWP.
- Let LaunchWP do the magic! ✨
- Conclusion
Boot/Create your VPS or cloud instance
To install WordPress on VPS, Start by logging in to your provider and creating a VPS or a dedicated server with the 24.04 LTS version of Ubuntu without modification and at least 1 GB of memory, and 20 GB of Disk Space. You will need access to the root user with either a password or SSH keys enabled.
Get it’s SSH details
Once you have the VPS or cloud instance up and running, you’ll need 4 things from your provider:
- IP address – The IP address of your Server.
- Port number – The Port for connecting via SSH. Default 22.
- SSH username – The SSH username for connecting. Heavily recommended to connect via ‘root‘
- Authentication method – Either your root Password, or a SSH key added to your root account.
Contact to LaunchWP

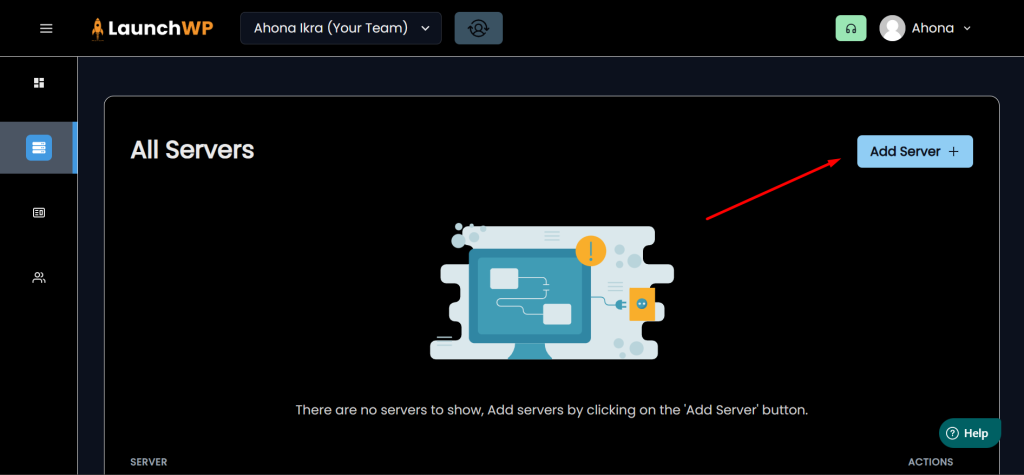
Once you’ve created a server at the provider of your choosing, log in to your LaunchWP Server dashboard and navigate under Servers > Add Server. You need to fill out the fields with the necessary information:
- Provider name – Just an identifier for yourself. Doesn’t matter for connection.
- IP address – The IP address of your Server.
- Port number – The Port for connecting via SSH. Default 22.
- SSH username – The SSH username for connecting. Heavily recommended to connect via ‘root‘
- Authentication method – Enter your Password or connect via the SSH Key command.
SSH login using password authentication is the easiest way, but if that’s disabled, you will need to SSH into the server and paste the given command in your terminal, and hit Enter. Hit Connect Server. For specific documentation regarding any specific providers, checkout our documentation or our Youtube channel, there might be the perfect steps you are searching for.
Let LaunchWP install WordPress on your VPS! ✨
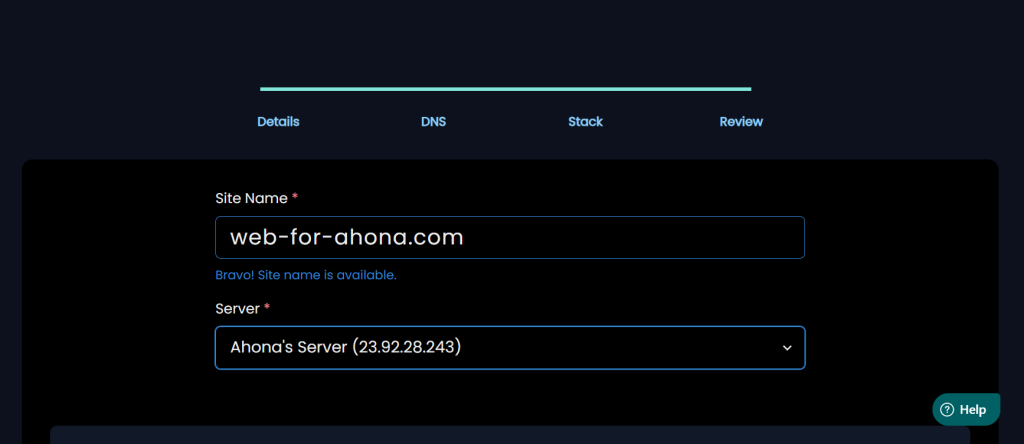
Your job is almost done. It’s time to let LaunchWP install WordPress on your VPS. Navigate under Sites from the navigation to create your first website with LaunchWP. Click Create SIte to get started. Below is a Map of each field on what to enter in each.
- Domain Name: This is the Domain name of your site. Make sure you own the domain and have access to its DNS tools before proceeding because you need to add a DNS record to it. Example: web-for-ahona.com
- Server: This is a dropdown of your all available Servers. Select the one you just connected.
- Adding DNS record: You need to now add a DNS record to your domain name before proceeding further. The type of DNS record should be of type “A”, and the Value should be your Server IP. You can find that on the same page, simply copy that value. You need to add that DNS record to your domain from your Domain provider. LaunchWP doesn’t manage your DNS, it’s your domain, which you are pointing to your own server. Check out this external documentation on how to add an A record to your domain: https://help.one.com/hc/en-us/articles/360000799298-How-do-I-create-an-A-record
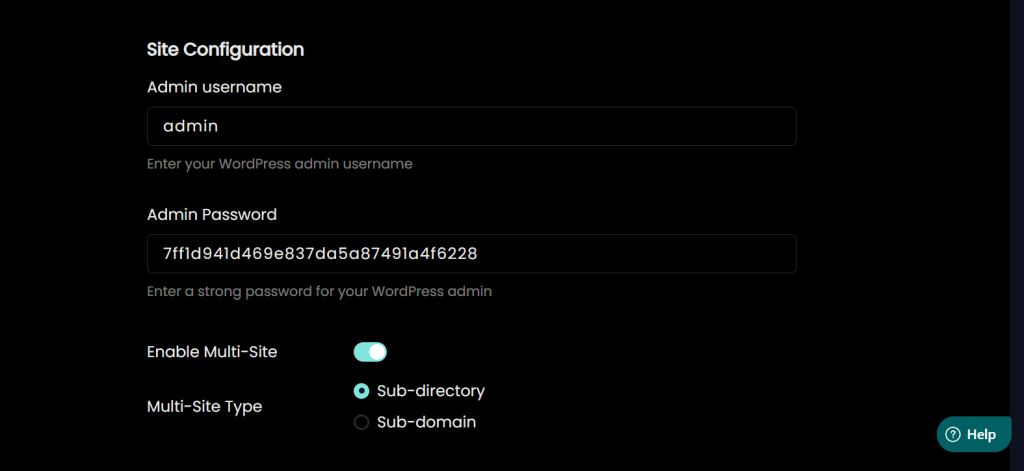
- Admin Username: This is the admin username on which your WordPress will be installed. Change the default value if you want.
- Admin Password: This is the admin password for your account. Change it if you would like to.
- Enable Multi-site: You can one-click enable multi-site if you would like. You can install multi-site in LaunchWP as both Sub-directory and Sub-domain. Choose as how you would like to.
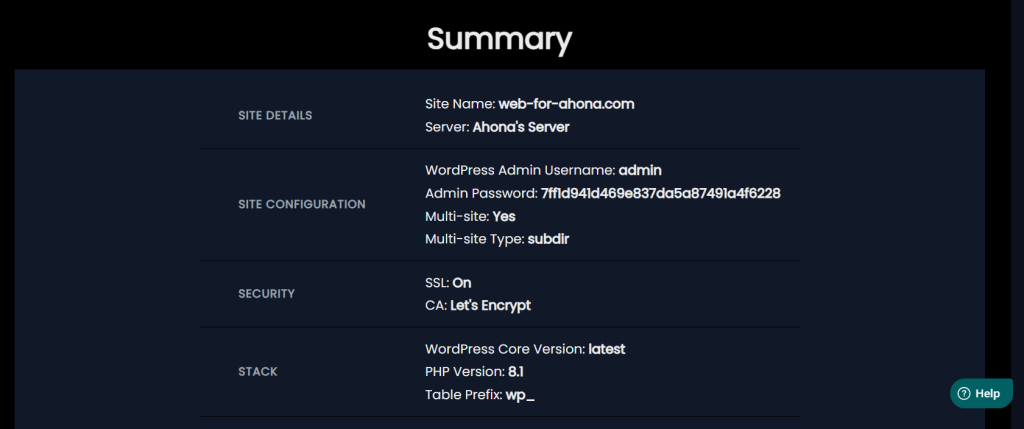
- SSL/ TLS: LaunchWP gives you a free SSL certificate from Let’s Encrypt. Keep this option checked unless you already have an SSL certificate installed from services like CloudFlare.
- WordPress Version: By default, it’s set to “latest”, which should pull the latest WordPress version. Include specific versions of WordPress if you want any like “6.7” or “6.7.1”.
- PHP Version: You can choose from a variety of PHP versions, LaunchWP will automatically add newer PHP versions as soon as the community starts adapting it.
- Table Prefix: By default the Database table it’s “wp_”. You can change it to any other prefix if you want. Do not change unless you know what you are doing.


Finally, simply click “Create Site”, and grab a coffee to sip. LaunchWP is now working to install your first WordPress website on your VPS or cloud server. Just to add a NOTE: If this is your First Site on your new server, it might take around 10 mins. Please avoid reloading the tab or closing it. If it faces any error, it will let you know. You can continue working on a new Tab. After that for your next sites on that server, it will hardly take 2-3 minutes to create a site.
Conclusion
Launching and Installing a WordPress site on your very own Virtual Private Server or VPS at Linode, AWS, GCP, DigitalOcean, or in one of the 1000s of cloud providers, is definitely the best option because you can get a powerful server, and have your WordPress sites run blazing fast without having to break the bank. You also have complete control of the server, and manage it like how you want.
With LaunchWP, you can manage all your WordPress sites and servers easily from one place. Easily change PHP versions, add custom NGINX and PHP config right from the UI, and access PHPMyAdmin, and SFTP with ease. Get help where you need, when you need, from our team of expert Sys Admins and WordPress devs. Launch WordPress sites on your own server in minutes, not hours. You can also host your client’s websites affordably and easily, adding precious recurring revenue to your agency or freelance business. LaunchWP makes it extremely easy to install, manage and host WordPress websites on a VPS or cloud server, giving you the complete control over your WordPress hosting.

