New Relic is a powerful tool that provides comprehensive monitoring and performance analytics for your web applications. Using New Relic, you can efficiently debug, monitor for bottlenecks within your WordPress websites, and gain expert-level technical insights. Good News is LaunchWP comes auto configured with New Relic for your WordPress websites, so simply connect your New Relic account, and optimize your WordPress for better user experiences.
Table of Contents
This doc will walk you how to access New Relic on LaunchWP, and use it to debug and monitor your WordPress websites like never before. When you install WordPress via LaunchWP on your server, LaunchWP auto-configures New Relic integration for you. You simply need to connect your New Relic Account to get started.
Setup New Relic Account
Before we begin using New Relic with WordPress, if you haven’t done so already, you’ll need to create a New Relic account here. For the purposes of this documentation, we will be using New Relic’s free plan, however, feel free to adjust this as you see fit to better accommodate your needs.

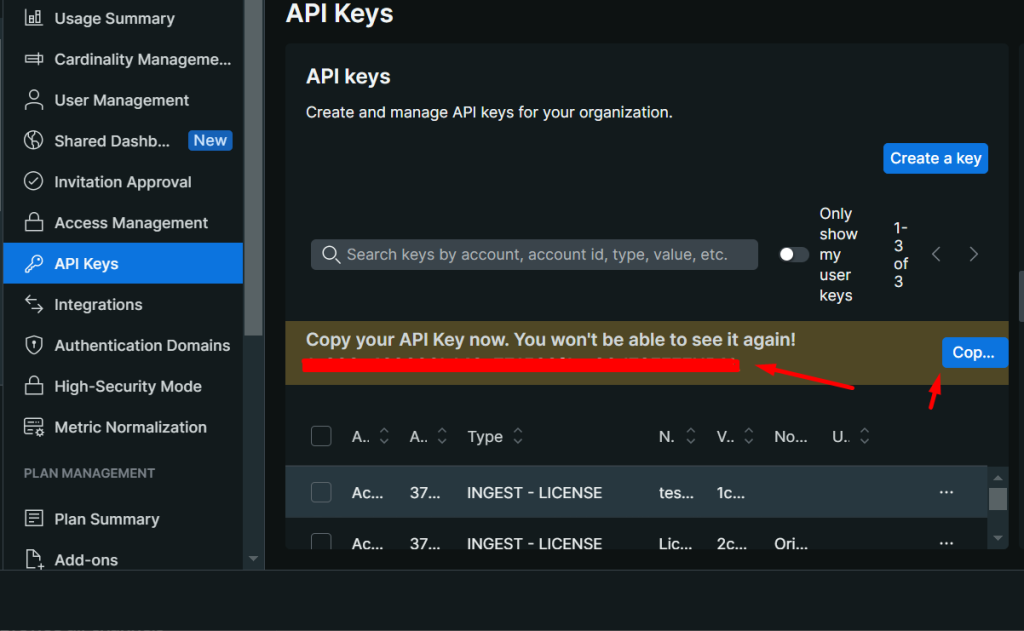
Let’s start by logging in to our New Relic dashboard and selecting Your Profile > API Keys.

From the API Keys page, you can create API keys to connect your New Relic with LaunchWP. Click on Create a key, and in:
- Account – Select the account you want to connect to. For my case, I only have one, so I will just let it selected.
- Key type – Select Ingest – License
- Name – Add a name, just for your identification.
- Notes – (Optional) Add notes for your identification.

After you hit Create a key, you will see a message saying “Copy your API Key now. You won’t be able to see it again!”. Copy the key and keep it someone safe for future use, also we need it now for connecting to LaunchWP.

Connecting to LaunchWP
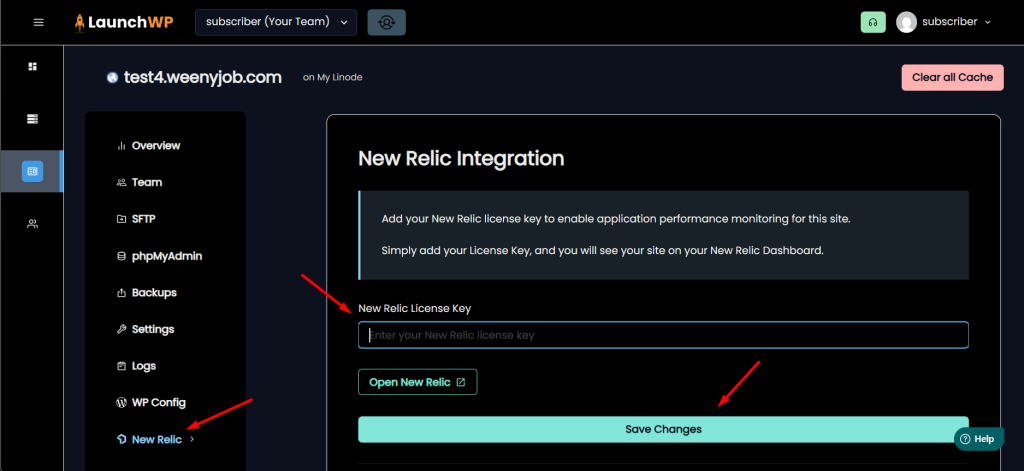
Next, it’s just pasting this Key you just copied, into your LaunchWP dashboard. Head over to your LaunchWP Server Dashboard, and navigate to your site > New Relic.

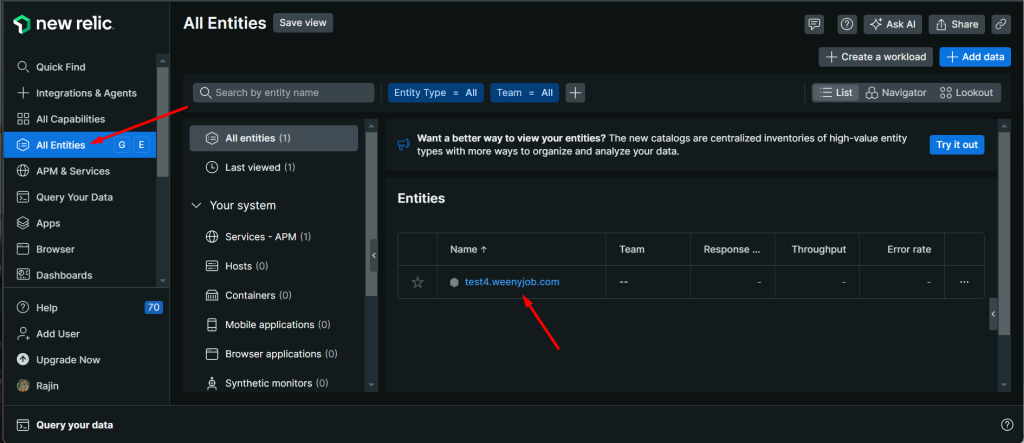
Here you can enter your License key you just copied, and Save Changes. LaunchWP will handle the rest, and after a while the site will show up in your New Relic Dashboard. Navigate under All Entities in your New Relic Dashboard, and you will find your website listed there, from where you can now monitor using New Relic.

And that’s how you can easily add New Relic for you LaunchWP sites, easily within a few minutes. If you face any kind of issues, feel free to open a support ticket, and our team would be more than happy to help you out.

