phpMyAdmin is a free software tool written in PHP, intended to handle the administration of MySQL over the Web. At LaunchWP, you can easily manage your Database via phpMyAdmin. It’s much more conveniant and easy rather than using a Desktop App, because it’s web based.
What about Security? As phpMyAdmin is web based, it’s much more prone to brute-force attacks as the Database control panel is simply one login behind for anyone. But Not in LaunchWP. We take security really seriously and so have 3 layer of protection ot make sure your phpMyAdmin of your website doesn’t fall in wrong hands.
Our layer of protection includes:
- Basic Auth – The phpMyAdmin URL is protected by Basic Auth, which means it’s only accessable by you and only the people that have the Basic Auth credentials.
- phpMyAdmin login – The basic login from phpMyAdmin. The username and password is unique to you, and is really strong, making sure that it’s not easily breakable by bruteforce.
- IP Restriction – The Ultimate protection. The phpMyAdmin is restricted by IP, means only the IPs whitelisted by you can access the phpMyAdmin URL. No one more or less. It’s the ultimate form of protection, and the highest possible.
Accesing phpMyAdmin
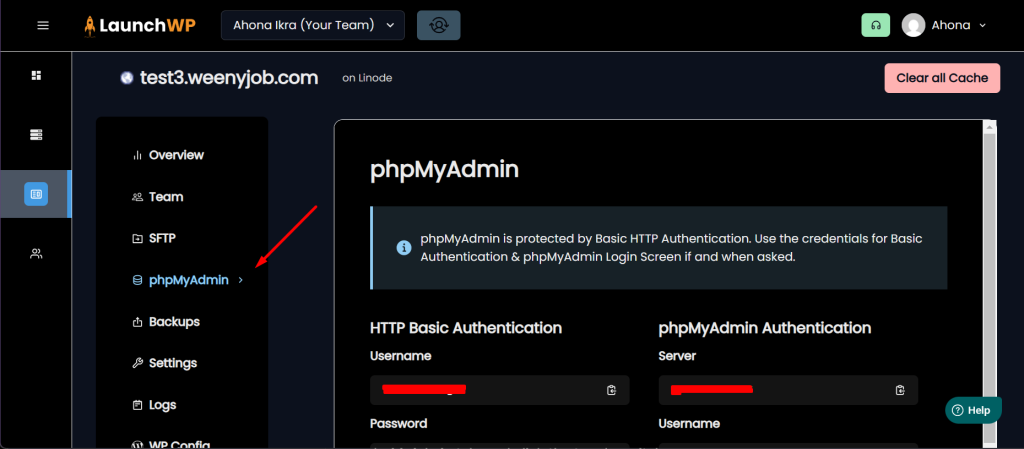
Accessing phpMyAdmin in LaunchWP is easy and just a few steps. To get started, login to your Server Dashboard, and go under your Site > phpMyAdmin.

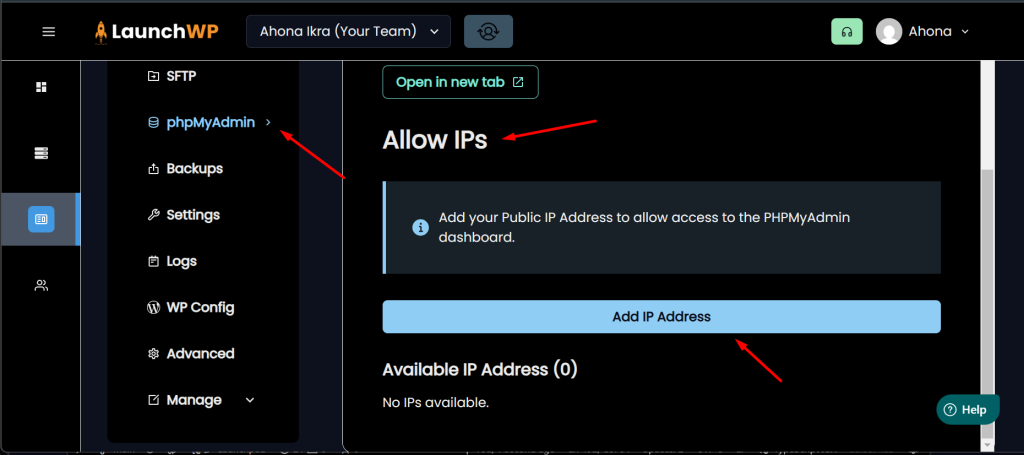
Here, you will find all the credentials to access phpMyAdmin. You can click Open in New tab, and that will open the phpMyAdmin URL in a new tab. But before we do that, we need to whitelist our IP for phpMyAdmin to access. For doing that, we need to scroll down a bit, and find Allow IPs > Add IP Address

Click Add IP Address and in the popup that appeared, enter a IP Name, meaning just a identifier for yourself. Such as Ahona’s IP. Then, on the field of IP Address, enter your Public IPV4 to whitelist. To find your IP, do a Google Search what is my ip, and you should see your Public IP listed. Below is what my form looks currently.

FInally click Add. This should whitelist your IP. Now you are good to accessing your phpMyAdmin. Scroll a bit up to click Open in new tab, and it should open the phpMyAdmin URL. The first you need to fill is the basic authentication credentials. You will see that on your screen, just copy and paste the Username and password.

Click Sign in. Then you need to fill your database credentials. You will find those as well in the phpMyAdmin screen of your LaunchWP Server Dashboard, just beside your Basic Auth credentials.

Simply enter your Server, Username and Password found on your LaunchWP Dashboard, and hit Log in. That’s it! It’s all easy and secure made by LaunchWP. If you face any issues, feel free to create a support ticket, and our team will get back to you with the solution.

